Table of Contents
Yes, it is possible to make an edible menu, read it and eat it simultaneously. I’m sure someone is probably already asking why I have to eat on the menu. There are a few reasons that come to my mind. Warning – not working on electronic devices.
- You are disappointed at the level of service.
- The price is unreasonably high.
- The menu sacks and you are so mad that you decide to snack on the menu.
Well, maybe not, as these ideas sound pretty far-fetched. So, what is the real purpose of an edible menu? Is it just edible paper or a fully flavoured and printed menu?
Imagine, while waiting for an appetizer or the main course to arrive, you usually get a bread roll with butter, chips, or crackers and a dipping source. The flavoured edible menu includes crackers, chips, or bread, served with a dipping sauce or by itself.
“Enjoy your menu, folks,” the server might say, triggering surprise, disbelief, and “Are you crazy” customer responses.
From this moment, they know they are in a place where the unexpected becomes the expected, the surprise is the norm, and they eagerly anticipate what’s next. The establishment’s sensory experiences and memories are some of the reasons for implementing modernist cuisine techniques. Also, this is when your patrons might realize the dining experience is much more than simply satisfying biological needs.
Creating the edible menu was one of the most exciting and fun Food&Beverage projects I’ve ever done. In 2010- early 2011, while looking around for some hydrocolloids for one of my molecular mixology recipes, I came across Chef Homaro Cantu” ‘s Moto restaurant. He was offering an edible menu to his customers. I’ve never thought of creating something like that, so naturally, I wanted to make one, but then I realized I didn’t know where to start and what to do. There was an interview with him, a video on YouTube, and some articles about his restaurant menu, but none of them explained how the edible menu was done.
The difficulty of finding more information on how to flavour and print the menu started me on three months of searching for edible inks, a printer compatible with these particular cartridges, how to add flavour to the printed paper/menu, and what kind of paper I had to buy. There was not much information on the Internet at that time on how to put all these things together to create an edible menu.
This post documents my steps for putting everything together and creating an edible menu. Chef Cantu’s approach probably was different, and I’m sure there are people out there using different ways as well, but that’s the beauty of it. As a bartender or cook, you are not confined to only one way of doing things; imagination and creativity are a big part of our crafts.
You will need a Designated Printer, Edible ink, and Edible paper to start the project.
Cartridges with edible inks can be purchased online. You can also buy them separately if you have a new and not-used compatible printer or a printer with already installed cartridges as a combo. There are many vendors; it will depend on whether they will ship to your place. I bought mine from https://inkedibles.com; I have no affiliation with them. One way to save money is to buy a better-priced printer and get the cartridges online. Just make sure the printer and the cartridges are compatible.
The edible paper I used was wafer paper made from potatoes, olive oil, and water. Once you have all this setup, you can make an edible menu.
I created the menu using two different methods, and both results had different textures and purposes, but as I said before, I’m sure there are some other ways of doing it.
Edible menu using a piping gel as a way to add flavour.
Initially, I wanted to learn how to add flavour to a paper. Without making the paper from scratch, I couldn’t just sprinkle some spices on it; I needed something to retain its flavour. After different tries, I found that the piping gel could keep the flavour. While waiting for my printer to arrive, I proceeded with the edible paper flavouring.
I warmed some gel in a microwave for about 10-15 and let it cool down for about 1-2 minutes before spreading a thin layer over the paper with a spatula.
I sprinkled some dust while the surface was still sticky; you can use any flavoured spices. To get an even flavour cover, ensure the gel is spread evenly; then, let it dry or bake it in the oven. I let it dry for a few hours, then put it in a Ziploc bag. I opened the bag after six hours, and the paper retained most of the flavour. It tasted good but had a more pronounced taste than the aroma. I also used light corn syrup instead of the piping gel, and the result was the same.
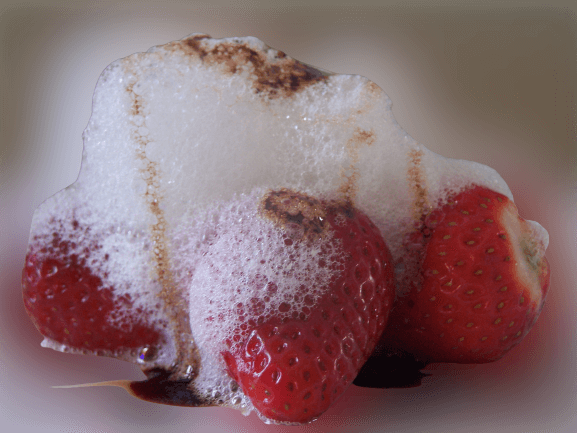
I also tried to spray flavour, strawberry syrup in my case, over the gel on the back of the paper, and I found out that I cannot spray anything too watery or too much at a time, as the paper may wilt. After that, I covered it and let it stay overnight. The result was pretty much the same as before; it tasted more than the aroma. The flavouring agents used all depend on the serving time, whether it has been served at the beginning or the end, and the accompanying dishes’ matching flavours.
Another way of adding aroma to the paper is by scenting cotton balls and putting them in a Ziploc bag together with the paper for one or two days, but my experiments didn’t stop there. I tried using alcohol for flavouring, and I did it in two different ways: spraying it on the gel side of the paper or adding it directly to the piping gel.
Method one;
I put a couple of ounces of Butterscotch schnapps in the Olive oil pump, spray it lightly on the back of the edible paper, and put it between two parchment papers. I went to check in for about one hour, and the paper had a pleasant Butterscotch aroma, but It was not completely dry, so I left it overnight in a slightly open Ziploc bag. The next day, the paper was dried, but the aroma was not as intense as before.
I also baked this menu in the oven on 400 F for about 5 min, light corn syrup with passion fruit syrup on one of the sides, the paper turned slightly brown on the back, so I scaled back the cooking time to 1-3 min.
Method two: Add alcohol or light corn syrup to the piping gel.
Mix alcohol with piping gel in a 1 to 2 ratio. Let it stand for about 15-20 min to jellify slightly. Spread a thin layer on the backside of the printed paper. Sprinkle with spices for additional flavour if desired. Bake for 1- 3 min at 375 -400 F or let it dry. Keep it in a closed container if not served right away. Serve by itself or on top of an appetizer.
Adding alcohol is mainly to add taste, substitute water, or dilute the gel if it is too thick. Watery-based substances may cause the wafer paper to shrink; a better option is to use oil-based ones as a base to add flavour. My preferred method of flavouring an edible paper is adding a few drops of your preferred oil, such as vanilla, amaretto, or passion fruit, to the gel.
Once you master the flavouring process, it is time for printing. The only difference between the edible and regular printers is ink and paper. Please don’t mix the edible inks with standard printer supplies. Keep the edible printer only for the designated purpose.
Once your menu or design is printed, flip it over, add the flavour, bake, and serve.
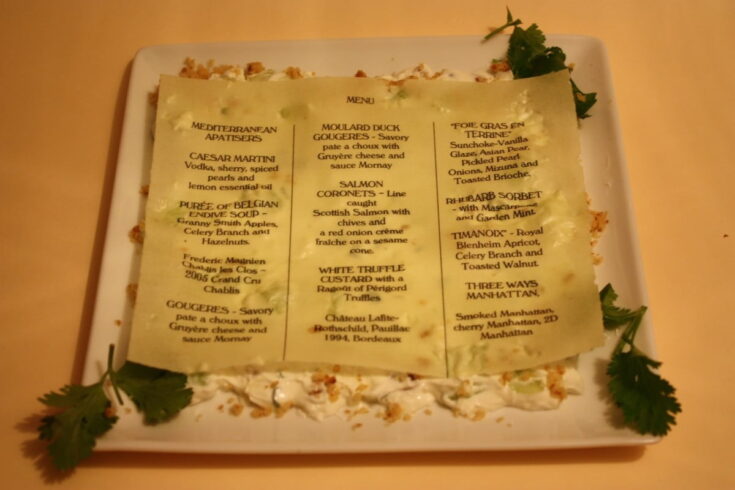
The menu below is from a sample restaurant menu I had with me. I printed it, flavoured it with oregano and garlic powder, and served it as an appetizer.
Edible Menu Recipe 1
Edible menu 1

The idea behind the menu is to present customers or friends with their menu for the night, giving them the chance to experience something new and have fun at the same time. Chips and dip—edible potato-based paper and appetizer.
This type of menu best works on a set menu of courses. The preparation time will depend on whether the menu will be flavoured or not.
Ingredients
- Edible wafer paper.
- Designated printer.
- Oregano spice.
- Garlic powder.
- 2-3 oz Light Corn Syrup
- Snow White Salad
- 16 oz strained Greek yogurt- overnight
- 1 cucumber
- 6 sprigs of dill
- 2-3 garlic cloves
- Walnuts
Instructions
- Print the menu first.
- Flip the back of the paper.
- Warm the light corn syrup for about 40 sec. Let it cool down a little bit.
- Spread a thin layer with a spatula and sprinkle the spices on it.
- Bake the menu for 3 minutes at 420 F.
- Put the menu on a side and prepare the salad.
For the salad.
- Stain the yogurt overnight in the fridge.
- Finely chop the cucumber, the Garlic, and the dill.
- Mix everything.
- Let it stay in the fridge for a couple of hours to infuse all the flavours.
- When ready to serve, sprinkle some crushed walnuts and put the menu on top.
Notes
Optional: Add olive oil and lemon juice to the salad. This dish is similar to Greek Tzatziki.
The printed menu is a copy of the restaurant menu I had with me, and I used it to show the principle of creating an Edible menu.


